How To Shoot in Manual | ISO Tutorial
Today is the third and final post in my “How to Shoot in Manual” blog series. If you haven’t already, be sure to check out Part 1, which not only covers shutter speed, but also sets the foundation for this series and the importance of learning to shoot in manual. You can also read Part 2 on aperture by clicking here.
Today I’m covering the 3rd element of shooting in Manual: ISO
What is ISO?
The letters actually stand for International Organization for Standardization. This is an organization that sets international standards for kinds of measurements. When it comes to your camera, ISO is simply your camera’s sensitivity to light.
How does ISO work?
The ISO number measures how much light the camera sensor allows in. The higher the number, the more light is let in. The lower the number, the less light comes in.
This is also where grain comes from. Grain is also referred to as noise, it’s when the quality of your image starts to get degraded. Think of this like static or a snowy display on an old television. The higher the ISO, the more grain will result in the final images. The goal is to keep your ISO number as low as possible while still maintaining a good exposure by balancing your other settings.
To give you a frame of reference, if you are outside shooting on a bright day, your ISO will be as low as possible, 100. When shooting indoors I often shoot in a range from 400-3200 ISO depending on how much light I need. I shoot with a Canon 5d mark iv, so my camera body handles higher ISO’s well, but I try not to exceed 3200 if possible to avoid grain.
In the image below, notice that the image isn’t quite as sharp as it could be. Specifically look in the background, instead of being clear or creamy, it has a snowy effect, which is called noise or grain. This image was taken just as the sun was setting and the room grew very dim. The ISO was set to 6400, which caused the grain.
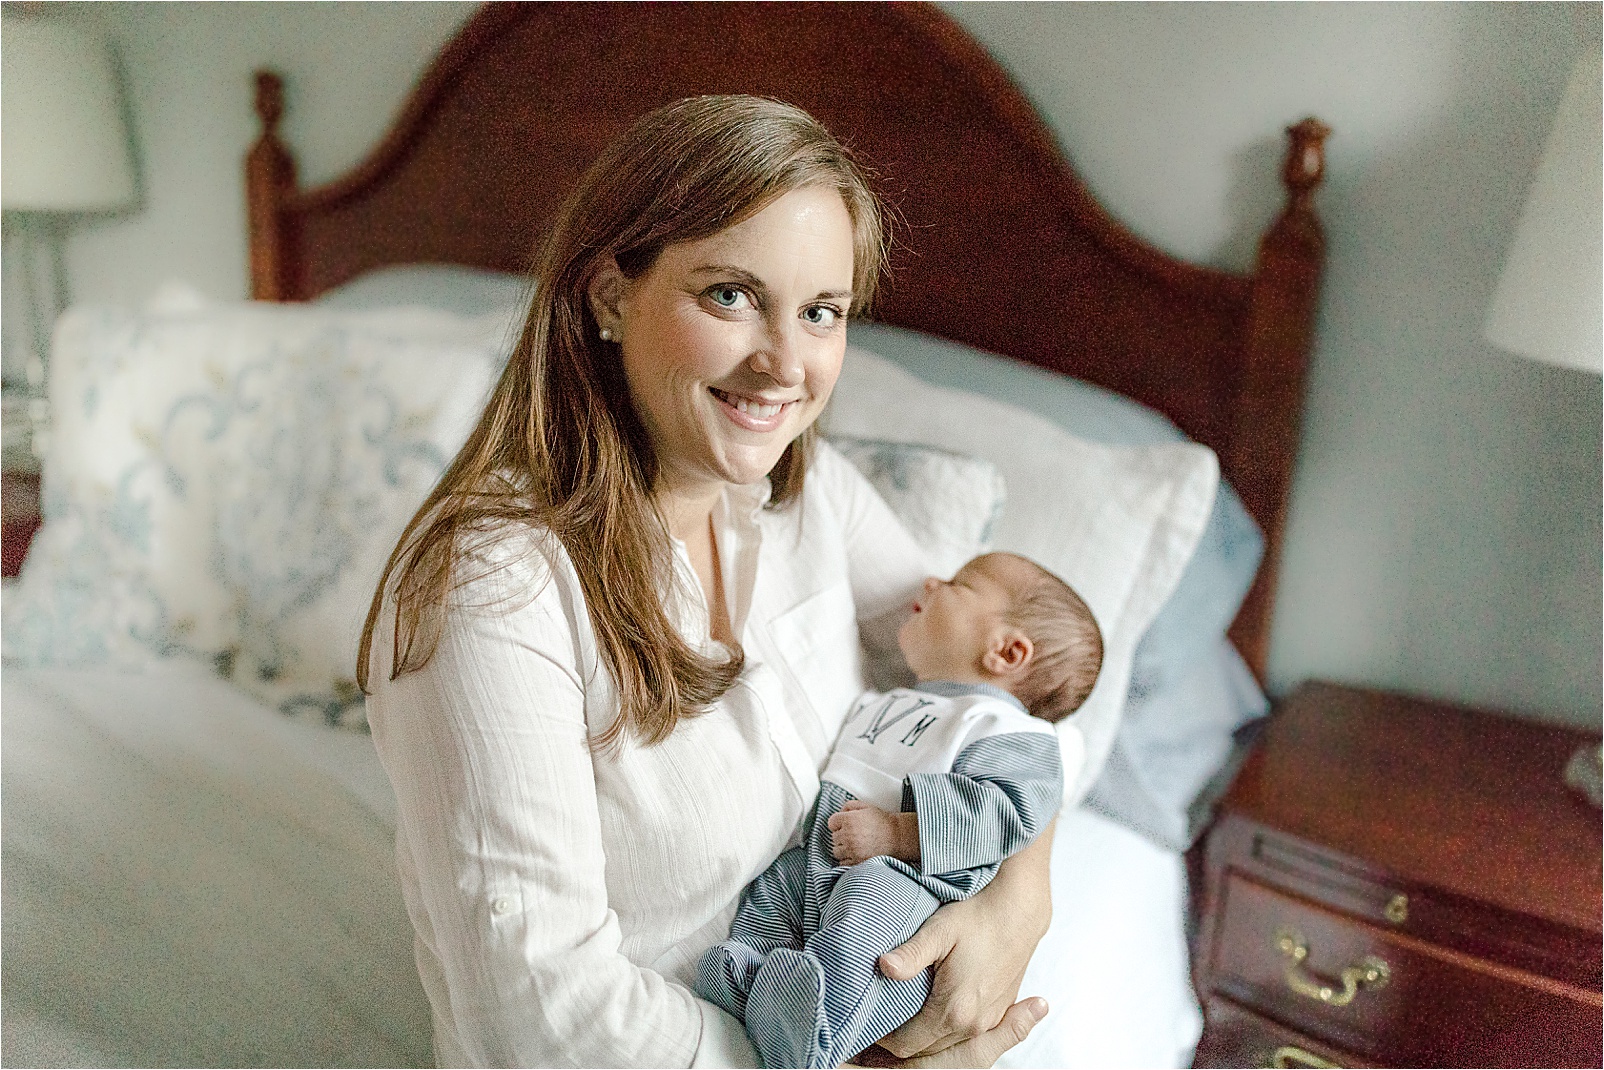
Shot at an ISO of 6400, causing a noisy background and loss of image quality.
The next image was shot on a beach as the sun was setting, with plenty of ambient light. The ISO setting was 100, so the subject of the image is crisp and clear, and the background is creamy and smooth with no noise.
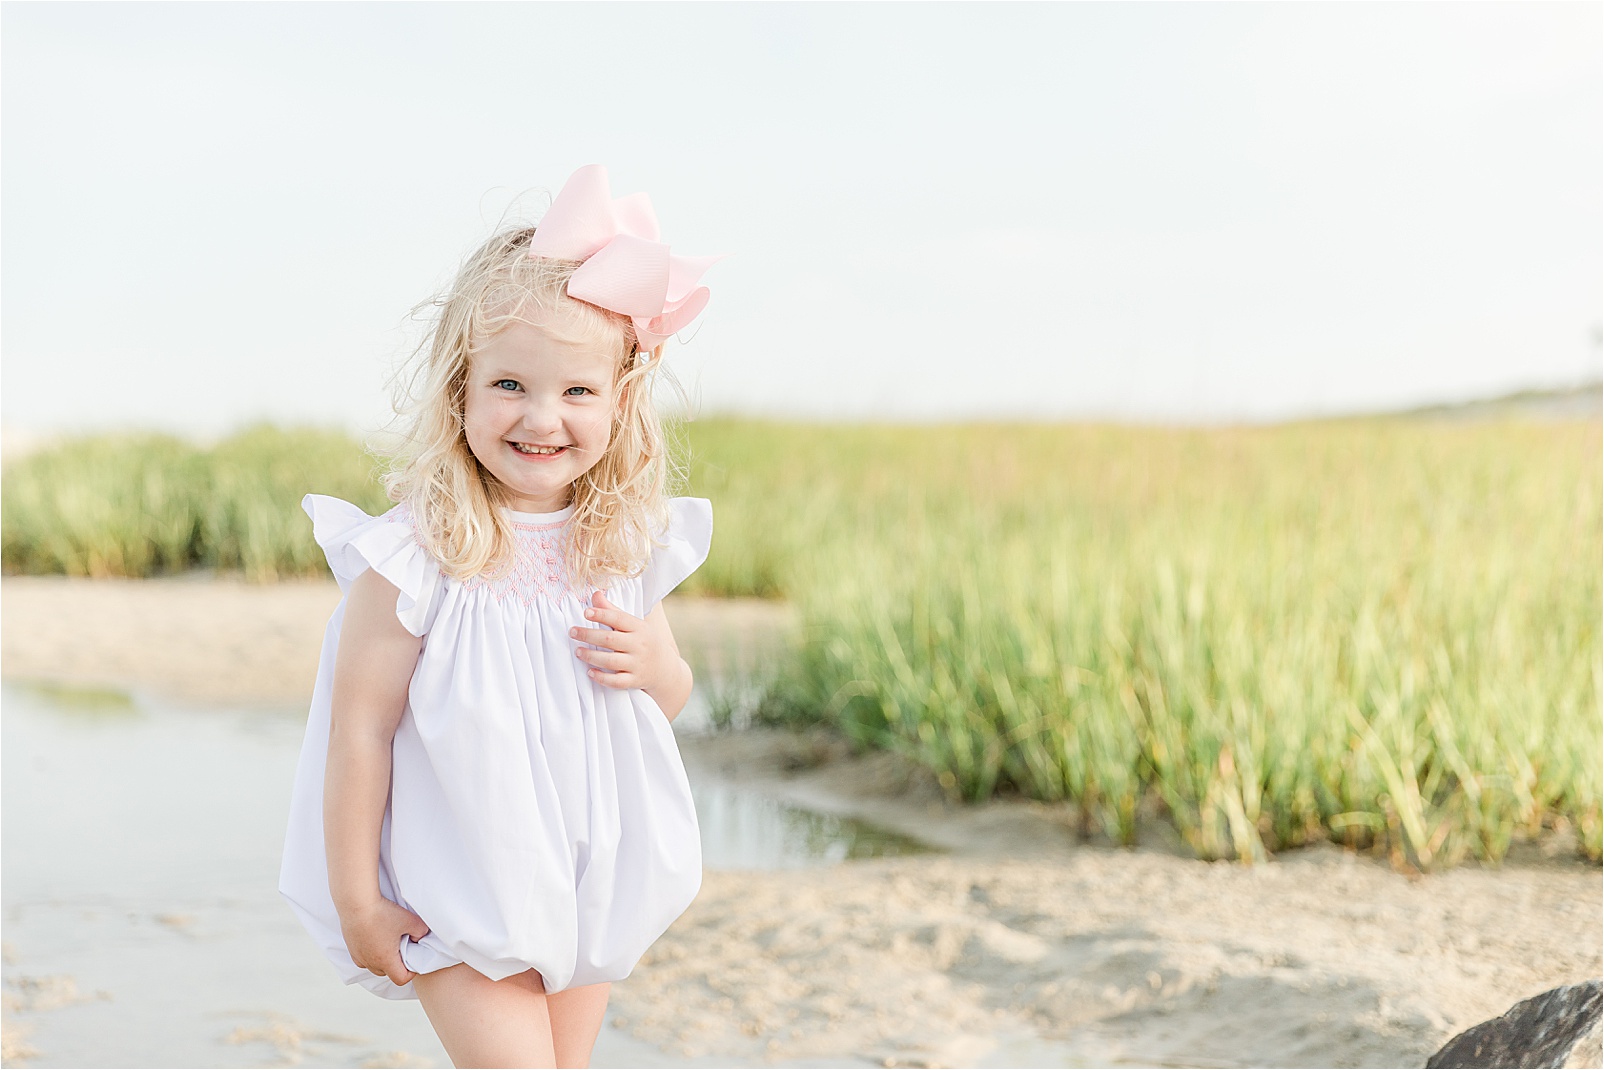
ISO setting of 100, creating a sharply focused subject and creamy background.
Every camera body has a threshold in ISO where you start to notice grain. The exact number will depend on your specific camera body. More expensive, pro line cameras can typically go higher in ISO before grain starts to be noticeable. I recommend testing your own camera body by shooting indoors in dim light. You can test your ISO levels to note where you see a lot of grain in your final images. This inspection of the images is best done on a computer screen. Oftentimes you won’t notice the grain on the back of your camera. You may keep shooting thinking everything is fine, and then in editing you discover all your images have too much grain! By knowing the capabilities of your camera and the average ISO where grain becomes a problem, you can then be mindful of this when you are shooting.
Applying Your Knowledge
Okay, let’s recap! The higher the ISO, the more light comes in, but be careful of grain/noise. The lower the ISO, the less light comes in.
You know I’m a big believer in knowing how to quickly change camera settings. So let’s find how to adjust ISO on your camera. Turn on your DSLR and turn the dial to M for manual mode. Most cameras will require you to halfway depress the shutter button to activate the meter and make setting adjustments.
Canon Rebel and EOS: Press the ISO button on top of the camera and then rotate the main dial with your index finger.
Nikon: Press the INFO button and using the back circular dial select ISO and then set the number you want and press OK. Some entry-level Nikon cameras have touch screens that allow you to asjust the ISO using that.
Nikon Semi-Pro and Pro lines: Press ISO button, rotate main command dial
You can refer to your owners manual or google your camera body if not listed above.
You may want to think about using the custom function button for ISO. Every camera has buttons that can be assigned a job to use for quick adjustments. Every camera’s process for doing this is different, you can consult your manual for your specific model.
Let’s Combine the 3 Settings: How I Choose My Settings
Now we can talk about what to do when you are combining your knowledge and choosing your settings. First, I think about what is most important to me in the shot I’m setting up. Do I really want a blurry background with a low aperture? Do I want to freeze motion with a high shutter speed? Do I want a crisp, clear image with no grain and a low ISO?
I think through this and decide which element is most important, and I make that setting first. Then, I adjust my other two settings to balance each other and get a good exposure. I’ll walk you through a few examples and how I choose my settings.
First up is this jumping shot of my son. When setting up this shot, the most important thing for me was to freeze the motion. So I knew to do this I would need to have a high shutter speed, at minimum 1/500. It was also very bright outside even though we were in the shaded portion of the pool. So my ISO should be set as low as possible, 100. Lastly I did not want a deep depth of field, because I wanted my son to be the focus and not the people who were in the background, so I choose an aperture of 2.8 to blur some of the background without letting in too much light since it was bright outside. I checked the meter through my viewfinder and saw that I could adjust my shutter speed to even faster to keep my image from being overexposed, or too bright. I settled on the settings of a shutter speed of 1/800, aperture of 2.8, and ISO of 100. Once I took a test shot, I knew my settings were good and I told my son to give me his best jump!
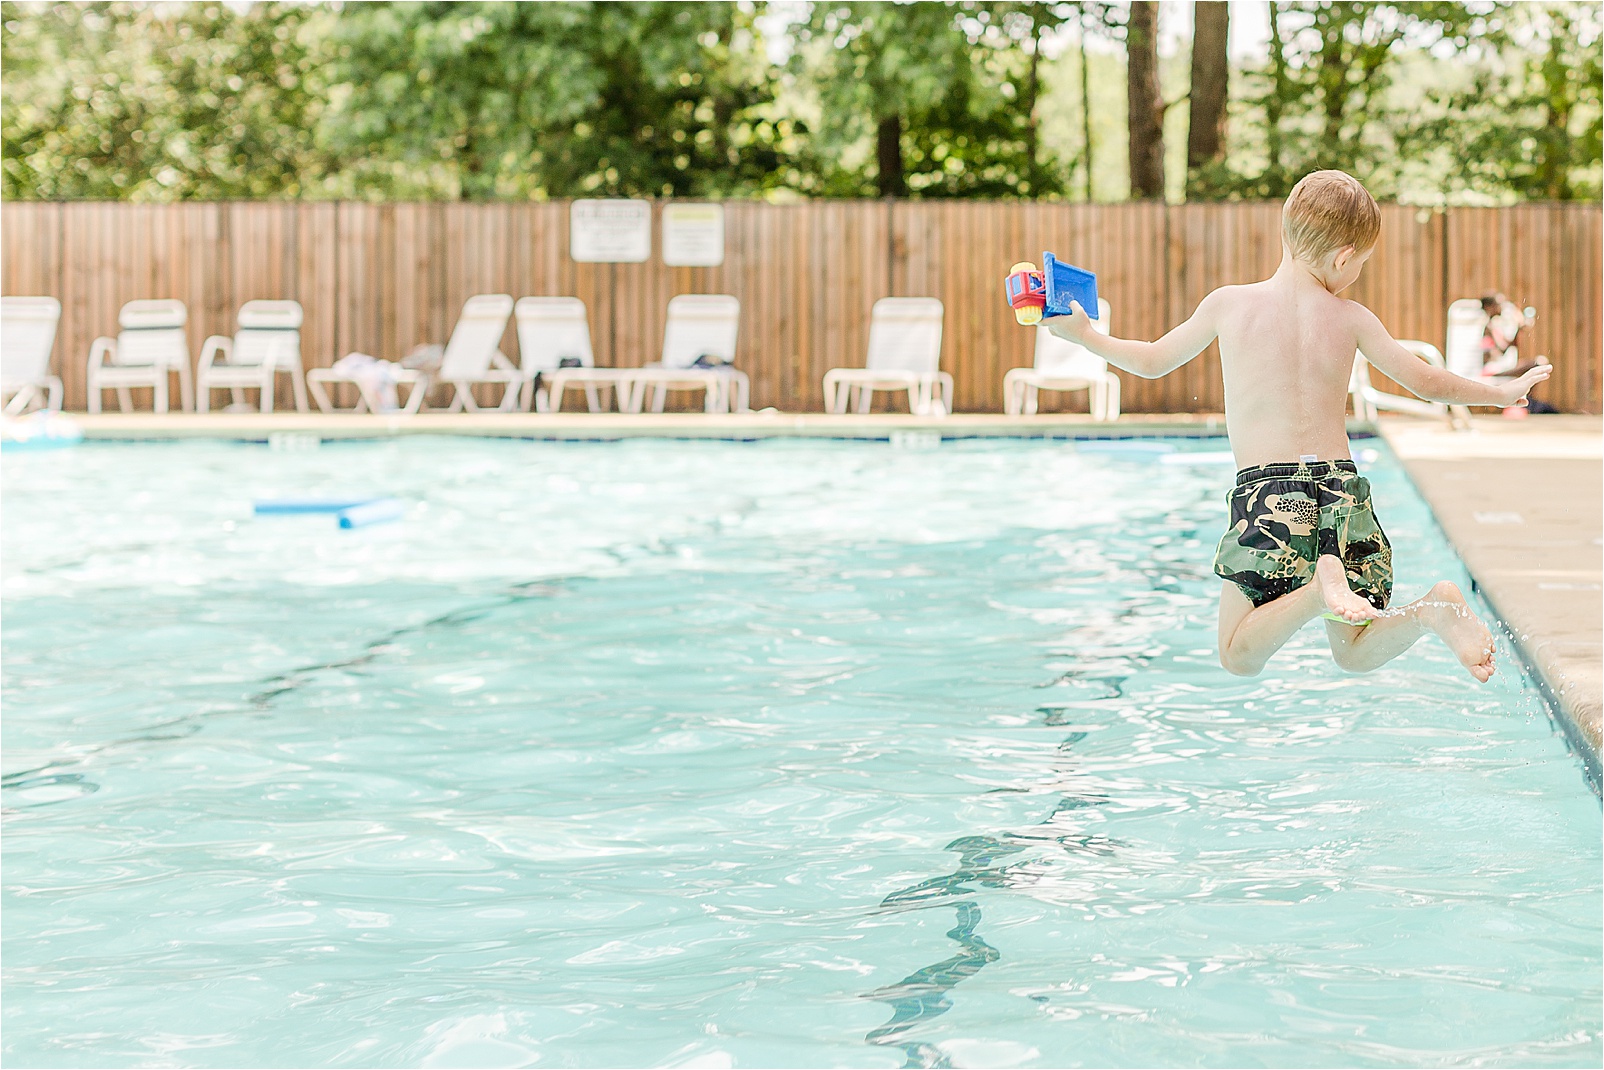
Shot with a 50mm lens: ISO 100, Aperture f/2.8, Shutter Speed 1/800
Next up is this Christmas tree shot. This was a tricky one! It was nighttime and all the lights were off in the room except for the Christmas tree. I wanted the tree to be the only source of light to create a magical effect. I knew I needed to let in as much light as possible with my settings since the only source of light was the tree. I started by setting my aperture very low, 1.4, and had my children stand close together, and close to the tree. This served two purposes: keeping them close to the same plane for depth of field and also kept them close to the light source to illuminate their faces. Next I set the shutter speed. Since I wanted to let in as much light as possible, I set it at 1/160. I know this is about as low as I can go for the shutter speed when holding my camera (not using a tripod) before the subtle shake of my hands would affect the image and cause blur. Lastly, I set the ISO. I knew I would have to push it to let in as much light as possible without getting too grainy, so I set it to 3200, which is the setting for my camera where I start to get a bit of grain as you can see in the shadows and edges of the photos.
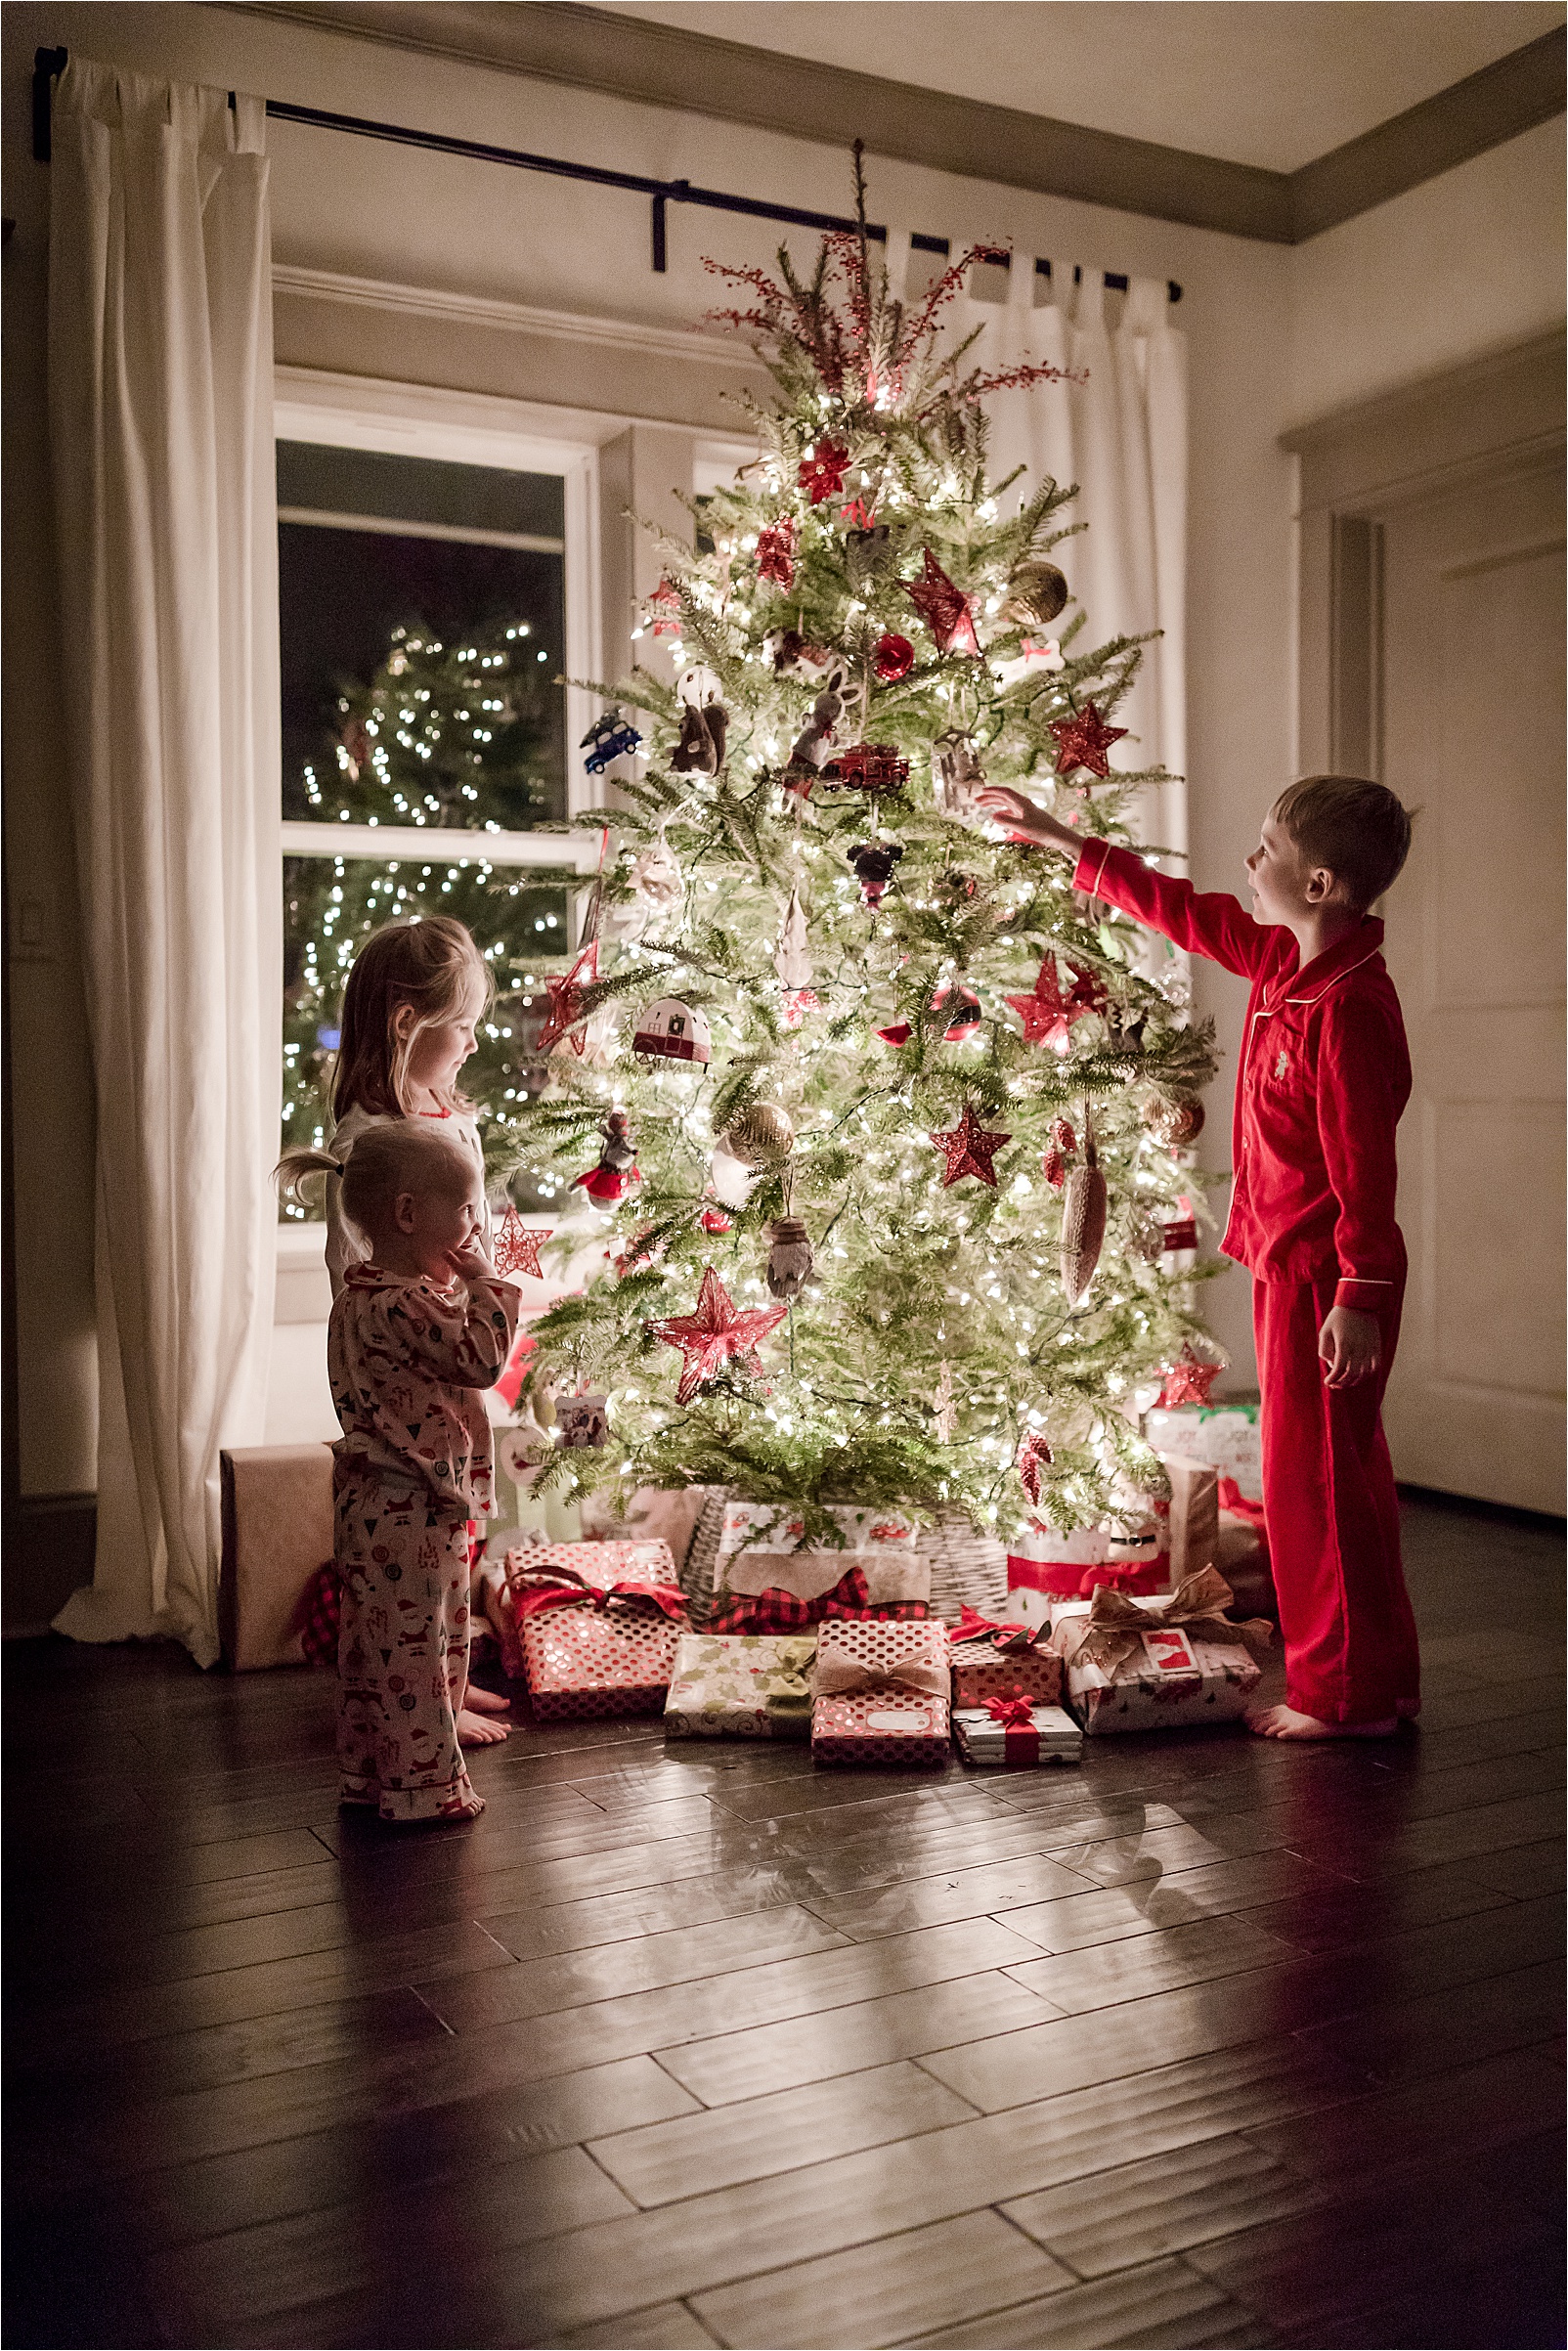
Shot with a 35 mm lens: ISO 3200, Aperture f/1.4, shutter speed 1/160
That’s A Wrap!
Thank you for joining me in the three part blog series on taking control of your DSLR and shooting in manual! If you missed it, Part 1 covers shutter speed and Part 2 covers aperture. The key here is practice, practice, practice! Soon, all these settings will come naturally! I recommend shooting every day, even if it’s just of still objects around your home.
_________________________________
Molly is a family, newborn, and brand photographer based in Greenville, South Carolina.
Come follow along on Instagram!
Molly
Comments
Leave a Comment
Leave a Reply
Meet Molly
Molly specializes in family & newborn photography in Greenville, SC. A former teacher and mother of three, she is known for capturing the joy & love of families. Photo sessions with Molly turn family memories into artwork for your home and for generations to come.
[…] Next up I will cover ISO! […]
[…] are three elements that you set to affect your exposure: shutter speed, aperture, and ISO. Each of these settings will have affect how much or how little light comes into your camera, and […]